How to Add a Table of Contents in Ghost CMS
Adding a table of contents to your Ghost CMS website is one of the most effective ways to improve your readers' experience. This simple enhancement not only makes your content more navigable but can significantly increase time-on-page metrics and reduce bounce rates. The best part? It takes less than 10 minutes to implement.
In this comprehensive guide, I'll show you two different methods to add an automatic table of contents to your Ghost website – one that requires no coding knowledge and another for those comfortable editing theme files.
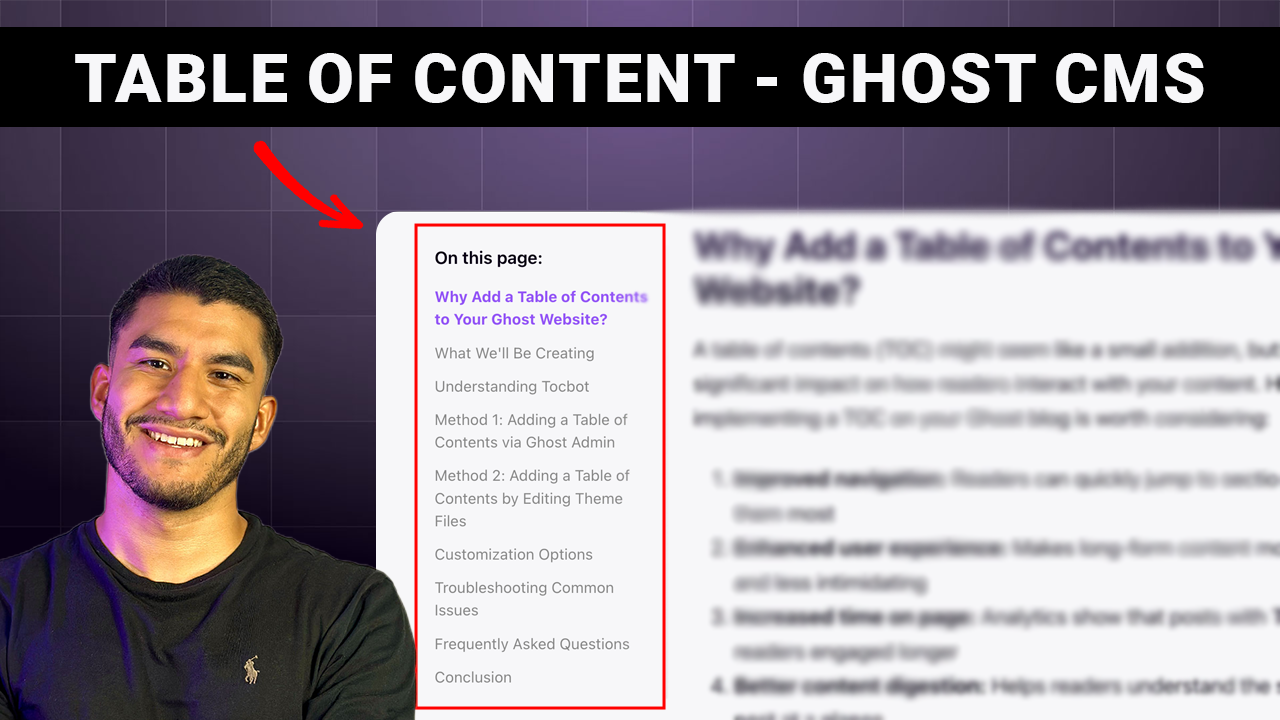
Why Add a Table of Contents to Your Ghost Website?
A table of contents (TOC) might seem like a small addition, but it can have a significant impact on how readers interact with your content. Here's why implementing a TOC on your Ghost blog is worth considering:
- Improved navigation: Readers can quickly jump to sections that interest them most
- Enhanced user experience: Makes long-form content more approachable and less intimidating
- Increased time on page: Analytics show that posts with TOCs tend to keep readers engaged longer
- Better content digestion: Helps readers understand the structure of your post at a glance
- SEO benefits: Structured content with clear navigation signals quality to search engines
According to a study by Nielsen Norman Group, users spend 80% of their time looking at information above the fold. A table of contents gives readers immediate insight into what value your article provides, helping them make quicker decisions about engaging with your content.
What We'll Be Creating
Before diving into the implementation, let's take a look at what we're building. The table of contents we'll add to your Ghost website will:
- Automatically detect all headings in your content
- Create clickable links to each section
- Display differently on desktop and mobile for optimal user experience
- Remain "sticky" on desktop while scrolling through content
- Appear at the top of the content on mobile devices
- Work automatically on all posts once implemented
- Update dynamically if you change your article structure
The best part about this implementation is that it's completely automatic. You don't need to manually create a table of contents for each new post – the system will generate it based on your heading structure. Just add your normal H1, H2, and other headings when writing, and the table of contents builds itself.
Understanding Tocbot
To make our automatic table of contents work, we'll be using a JavaScript library called Tocbot. Don't worry about the technical name – all you need to know is that this lightweight library does all the heavy lifting for us.
Tocbot works by:
- Scanning your content for heading tags (H1, H2, H3, etc.)
- Creating a structured list of links to those headings
- Adding smooth scrolling when readers click those links
- Highlighting the current section as readers scroll through the post
This provides a seamless experience for your readers without requiring you to maintain anything manually after the initial setup.
Method 1: Adding a Table of Contents via Ghost Admin
This method is perfect for beginners or anyone who doesn't want to edit theme files directly. We'll implement the table of contents using Ghost's code injection feature, which allows you to add custom code without modifying your theme.
Adding the CSS
First, log into your Ghost admin panel. If you're not sure where that is, just go to yourdomain.com/ghost in your browser.
Navigate to Settings → Design → Code injection.
In the Site Header section, add the following code:
<link rel="stylesheet" href="https://cdnjs.cloudflare.com/ajax/libs/tocbot/4.12.3/tocbot.css">

<style>
.gh-content {
    position: relative;
}

.gh-sidebar {
    position: absolute;
    top: 0;
    bottom: 0;
    margin-top: 82px;
    margin-right: 24px;
    grid-column: wide-start / main-start; /* Place the TOC to the left of the content */
}

.gh-toc{
    font-size: 14px;
    line-height: 150%;
    position: sticky; /* On larger screens, TOC will stay in the same spot on the page */
    top: 5vmin;
    border-right: solid 1px #d3d3d3;
    padding-right: 16px;
}

.gh-toc::before {
    content: 'On this page:';
    display: block;
    margin-bottom: 15px;
    font-size: 16px;
    font-weight: 600;
}

.gh-toc > .toc-list {
    position: relative;
}

.toc-list-item{
    margin-bottom: 1rem;
    color: #949494;
}

a.toc-link{
  text-decoration: none;
}

.toc-link::before{
    display: none;
}

.toc-list {
    overflow: hidden;
    list-style: none;
    padding: 0;
}

.toc-list-item.is-active-li{
    color: var(--ghost-accent-color);
}

@media(max-width: 768px){
    .gh-sidebar {
        position: relative;
        margin-top: 0;
        margin-right: 0px;
        grid-column: main-start;
    }

    .gh-toc{
        position: relative;
        border-radius: 16px;
        padding: 16px;
        top: 0;
        border: solid 1px #d3d3d3;
    }

    .toc-list-item.is-active-li{
        color: #000;
    }

    .toc-list-item{
        line-height: 130%;
        color: #000;
    }

    .is-active-link{
        font-weight: 400;
    }
}
</style>
This CSS does several important things:
- Positions the table of contents to the left of your content on desktop
- Makes it "sticky" so it stays visible as readers scroll
- Creates a nice mobile view that appears above your content
- Styles everything to blend perfectly with your theme
- Adds a "On this page:" heading to the table of contents
- Highlights the current section using your Ghost accent color
Adding the JavaScript
Now, scroll down to the Site Footer section. Here, we'll add the JavaScript that makes everything work:
<script src="https://cdnjs.cloudflare.com/ajax/libs/tocbot/4.12.3/tocbot.min.js"></script>

<script>
    // Add the TOC element to each post
    if (document.querySelector('.gh-content')) {
        // Create sidebar and TOC container
        const sidebar = document.createElement('aside');
        sidebar.className = 'gh-sidebar';

        const toc = document.createElement('div');
        toc.className = 'gh-toc';

        sidebar.appendChild(toc);

        // Insert at the beginning of the content (inside it)
        const content = document.querySelector('.gh-content');
        content.insertBefore(sidebar, content.firstChild);

        // Initialize Tocbot
        tocbot.init({
            // Where to render the table of contents
            tocSelector: '.gh-toc',
            // Where to grab the headings to build the table of contents
            contentSelector: '.gh-content',
            // Which headings to grab inside of the contentSelector element
            headingSelector: 'h1, h2',
            // Ensure correct positioning
            hasInnerContainers: true,
        });
    }
</script>
This JavaScript code performs three essential functions:
- Loads the Tocbot library
- Creates the container for your table of contents
- Tells Tocbot to look for H1 and H2 headings in your content
I'm only using H1 and H2 headings in this example because that works best for most blogs. We'll cover how to include more heading levels in the customization section.
Click Save, and we're done with Method 1!
Testing Your Table of Contents
Now, navigate to any article on your website that includes headings. You should see your new table of contents in action:
- On desktop, it should appear to the left of your content and stay visible as you scroll
- On mobile, it should appear at the top of your content, making it easy for mobile readers to navigate
If everything looks good, congratulations! You've successfully implemented an automatic table of contents on your Ghost website.
Method 2: Adding a Table of Contents by Editing Theme Files
If you're more comfortable with code and want more control over your implementation, Method 2 is for you. This approach involves directly editing your Ghost theme files.
I'm assuming you already know how to download, edit, and re-upload your Ghost theme. If that's not the case, you might want to stick with Method 1.
Modifying default.hbs
First, download your current theme from the Ghost admin panel (Settings → Design → download theme).
Extract the theme files and open default.hbs in a code editor. Look for the head section near the top of the file.
Right before the {{ghost_head}} tag, add the Tocbot CSS link:
<link rel="stylesheet" href="https://cdnjs.cloudflare.com/ajax/libs/tocbot/4.12.3/tocbot.css">
Then, add our custom styles. You can place this right after the CSS link:
<style>
.gh-content {
    position: relative;
}

.gh-sidebar {
    position: absolute;
    top: 0;
    bottom: 0;
    margin-top: 82px;
    margin-right: 24px;
    grid-column: wide-start / main-start; /* Place the TOC to the left of the content */
}

.gh-toc{
    font-size: 14px;
    line-height: 150%;
    position: sticky; /* On larger screens, TOC will stay in the same spot on the page */
    top: 5vmin;
    border-right: solid 1px #d3d3d3;
    padding-right: 16px;
}

.gh-toc::before {
    content: 'On this page:';
    display: block;
    margin-bottom: 15px;
    font-size: 16px;
    font-weight: 600;
}

.gh-toc > .toc-list {
    position: relative;
}

.toc-list-item{
    margin-bottom: 1rem;
    color: #949494;
}

a.toc-link{
  text-decoration: none;
}

.toc-link::before{
    display: none;
}

.toc-list {
    overflow: hidden;
    list-style: none;
    padding: 0;
}

.toc-list-item.is-active-li{
    color: var(--ghost-accent-color);
}

@media(max-width: 768px){
    .gh-sidebar {
        position: relative;
        margin-top: 0;
        margin-right: 0px;
        grid-column: main-start;
    }

    .gh-toc{
        position: relative;
        border-radius: 16px;
        padding: 16px;
        top: 0;
        border: solid 1px #d3d3d3;
    }

    .toc-list-item.is-active-li{
        color: #000;
    }

    .toc-list-item{
        line-height: 130%;
        color: #000;
    }

    .is-active-link{
        font-weight: 400;
    }
}
</style>
Next, scroll to the bottom of default.hbs. Before the {{ghost_foot}} tag, add the Tocbot script:
<script src="https://cdnjs.cloudflare.com/ajax/libs/tocbot/4.12.3/tocbot.min.js"></script>

<script>
// Initialize Tocbot
tocbot.init({
    // Where to render the table of contents
    tocSelector: '.gh-toc',
    // Where to grab the headings to build the table of contents
    contentSelector: '.gh-content',
    // Which headings to grab inside of the contentSelector element
    headingSelector: 'h1, h2',
    // Ensure correct positioning
    hasInnerContainers: true,
});
</script>
Editing post.hbs
Now, open post.hbs. We need to find where the content is displayed. Look for the {{content}} helper tag.
Right before it, add this line:
<aside class="gh-sidebar"><div class="gh-toc"></div></aside>
This creates the container where Tocbot will insert your table of contents.
Implementing the Changes
After making these changes, save your files, zip up the theme folder, and upload it back to Ghost. Then activate your updated theme.
Visit any post with headings to test if your table of contents is working correctly. You should see the same behavior as described in Method 1.
Customization Options
Now that you have a functional table of contents, you might want to customize it to better match your site's design. Here are some common customizations:
Changing the Header Text
In the CSS, locate this section:
.gh-toc::before {
    content: 'On this page:';
    display: block;
    margin-bottom: 15px;
    font-size: 16px;
    font-weight: 600;
}
You can change 'On this page:' to whatever you prefer – 'Contents', 'Jump to:', 'In this article', etc.
Modifying the Color Scheme
By default, our table of contents uses your Ghost theme's accent color to highlight the active section. If you want to use a different color, find this CSS rule:
.toc-list-item.is-active-li{
    color: var(--ghost-accent-color);
}
Replace var(--ghost-accent-color) with your preferred color, such as #3eb0ef or rgb(62, 176, 239).
Including Additional Heading Levels
If you want to include H3, H4, or other heading levels in your table of contents, modify the headingSelector parameter in the JavaScript:
headingSelector: 'h1, h2, h3, h4',
This will include H1, H2, H3, and H4 headings in your table of contents. Be careful not to include too many levels, as this can make your table of contents cluttered.
Troubleshooting Common Issues
If your table of contents isn't appearing or working correctly, here are some common issues and solutions:
No table of contents appears:
- Make sure your post has heading tags (H1, H2, etc.) – no headings, no table of contents
- Check that you've saved all code changes and refreshed the page
- Verify that there are no JavaScript errors in your browser console
Table of contents appears but doesn't align correctly:
- The class names in this tutorial (gh-content, gh-toc) are based on official Ghost themes
- If you're using a custom theme, you might need to adjust these class names
- Check your theme to see where the
{{content}}tag is and what class contains it
Frequently Asked Questions
Will the table of contents work with all Ghost themes?
The implementation in this guide works with all official Ghost themes and most custom themes. However, some custom themes might require adjustments to the class names or styling.
Does this affect my site's loading speed?
The Tocbot library is very lightweight (around 4KB gzipped) and loads asynchronously, so it won't significantly impact your site's loading speed.
Can I use this with Markdown or the Ghost editor?
Yes! This solution works with content created in both the Ghost editor and with Markdown. As long as you're using proper heading tags (H1, H2, etc.), the table of contents will generate automatically.
Will the table of contents update if I edit my post?
Absolutely! The table of contents is generated dynamically when the page loads, so any changes to your headings will be reflected immediately after you update the post.
Conclusion
Adding a table of contents to your Ghost CMS website is a simple yet powerful enhancement that can significantly improve your readers' experience. Whether you chose Method 1 (using Ghost's code injection) or Method 2 (editing theme files), you now have an automatically-generated table of contents that works across all your posts.
This feature not only makes your content more navigable but can also boost important metrics like time-on-page and reduce bounce rates. Plus, the professional appearance adds an extra touch of quality to your Ghost blog.
For more Ghost CMS tips and tricks, subscribe to my newsletter or check out these related articles.
Last Updated: April 25, 2o25
Resources: